Windows 10, by default, is highly popular to strip you of your privacy. Oh, Wait! Don’t you know that? Please be known that Windows 10, by default, has permission to sent lots of your data back to Microsoft servers, and you’ll never know when and how the data transfer took place. And not any antivirus or malware could stop that, but it’s you who need to do some manual settings for protecting your privacy. And not just that, even Windows 10 has a keylogger too, which is recording every stroke of data you’re typing back to Windows 10. That includes all the usernames and passwords also, which you type in websites and other places.
Must Read: Windows 7 and 8 Also Spy On you Like Windows 10 Do – Here’s a Way to Stop Them
Although keylogger in Windows 10 was supposed to be in Windows 10 Technical preview editions only which log and send “voice information” as well as “typed characters” and was there for testing purposes only. But that news comes out to be False!

Even though Microsoft has added so many features that are really useful in the long-term, but for the betterment of those products or features, they collect a good quantity of user data. One of the most significant sources of it is Cortana, which personalizes its features depending upon your need and collects your voice inputs, contact, and calendar entries. Windows 10 also collects data from the features which are connected to the cloud. Hence, it becomes a necessity for an operating system to collect data, filter and exclude your personal information and send it to Microsoft Servers. But who’s comfortable with that? I am Not!
Ultimate Guide to Turn off Windows 10 Privacy Settings
Turning off data mining features in Windows 10 is easy, all you need to know where those toggles are, and you’re good to go. But it’s a good list to follow before you may get rid of all the data mining features of Windows 10. There are two ways to do so. Either use a free application we recommend or do the manual way, which requires few steps.
How to Turn Off Windows 10 Privacy Issues Using an Application (Easiest Method)
There are over 35 privacy issues in Windows 10, which users need to address for protecting their privacy. If you leave those as is, a good amount of data is sent back to Microsoft periodically. If you have selected “Express Settings” while installing Windows 10, you gave permissions to Microsoft to gather data of following types:
- Location Data
- Biometrics and Handwriting data
- Advertisement and its Tracking Code
- Apps access to your personal information
- Windows Defender and Sample submissions
- Microsoft OneDrive
- Cortana & Web search
- Telemetry services
- Webcam and Microphone Access
- Sync Data with other Devices
- Using Microsoft account, Instead of local account
- Sending Feedback & diagnostics reports to Microsoft
- and many more…
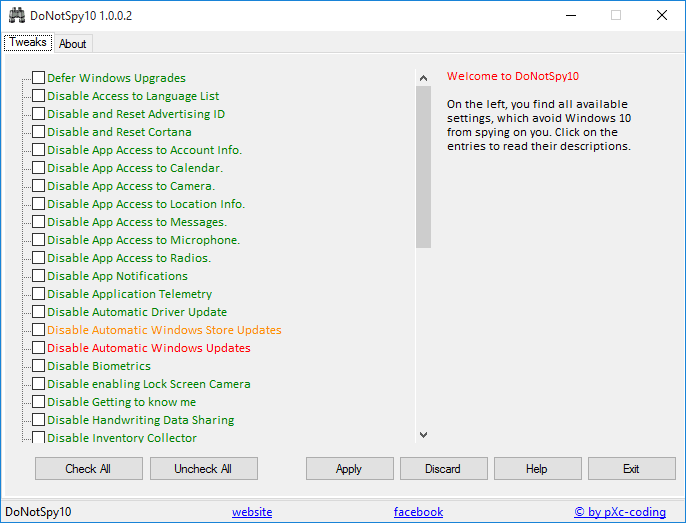
To disable sending data from all above types, install a software application named DoNotSpy10. This is the first software app in my knowledge, which is an antispy tool for Windows 10. This app gives you a fair choice of what data you’re fine sharing with Microsoft and What NOT. And I won’t recommend you to turn off all the features, and some are required by OS to function correctly and to manage a proper communication with other apps and for checking of updates. There are 37 settings currently which you can disable using this app as follows:
- Disable Telemetry
- Disable Biometrics
- Disable Handwriting Data Sharing
- Disable Handwriting Error Reporting
- Disable Application Telemetry
- Disable Inventory Collector
- Disable Steps Recorder
- Disable enabling Lock Screen Camera
- Disable and Reset Cortana
- Disable Location
- Disable Sensors
- Disable Web Search*
- Disable Windows Media DRM Internet Access
- Defer Windows Upgrades*
- Disable App Notifications
- Disable Password Reveal Button*
- Disable and Reset Advertising ID
- Disable SmartScreen Filter for URLs*
- Disable Sending Writing Info
- Disable Access to Language List*
- Disable App Access to Location Info*
- Disable App Access to Camera*
- Disable App Access to Microphone*
- Disable Getting to know me
- Disable App Access to Account Info*
- Disable App Access to Calendar*
- Disable App Access to Messages*
- Disable App Access to Radios*
- Disable Sync With Devices*
- Disable Windows Feedback Requests*
- Disable Windows Update Sharing
- Disable Windows Update for other Products*
- Disable WiFi Sense
- Disable Windows Defender*
- Disable Automatic Windows Updates*
- Disable OneDrive
- Disable Automatic Driver Update*
- Disable Automatic Windows Store Updates*
- Enable Do Not Track in Edge
- Disable Malicious Software Removal Tool via Windows Update*
- Disable KMS Client Online Validation
- Disable Retrieving Device Metadata
- Disable Windows Customer Experience Improvement Program
All features marked with * are the ones we don’t recommend to disable it. Choice is yours.
How to Turn Off Windows 10 Privacy Settings (Manual Method)
So, you have chosen to turn off Windows 10 privacy settings manually, Good Enough! Following are the ways to do it:
Be Selective During Windows 10 Install
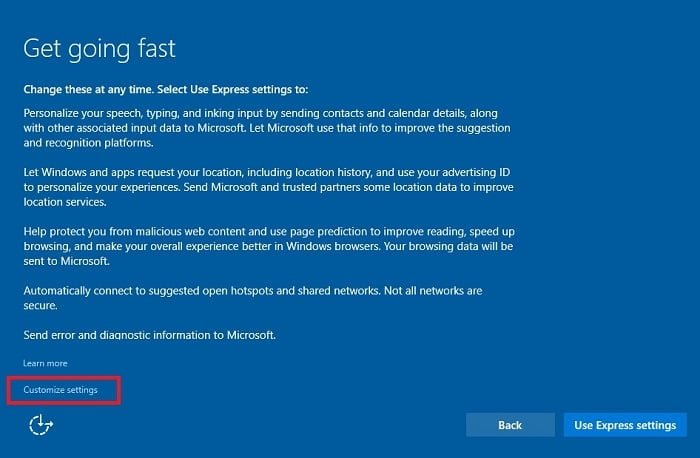
During Windows 10 installation, when Windows 10 asks you if you want to use Expressive Settings or want to Customize it? Here’s what Windows 10 asks you to agree for:
Personalize your speech, typing and inking input by sending contacts and calendar details, along with other associated input data to Microsoft. Let Microsoft use that info to improve the suggestion and recognition platforms.
Let’s Windows and apps request your location, including location history, and use your advertising ID to personalize your experiences. Send Microsoft and trusted partners some location data to improve locations services.
Help protect you from malicious web content and use page prediction to improve reading, speed up browsing, and make your overall experience better in Windows browsers. Your browsing data will be sent to Microsoft.
Automatically connect to suggested open hotspots and shared networks. Not all networks are secure.
Send error and diagnostic information to Microsoft.
So, rather than selecting Express Settings, choose Customize Settings, and you can select toggles as per your requirement and comfort. The first screen would give you the following options:
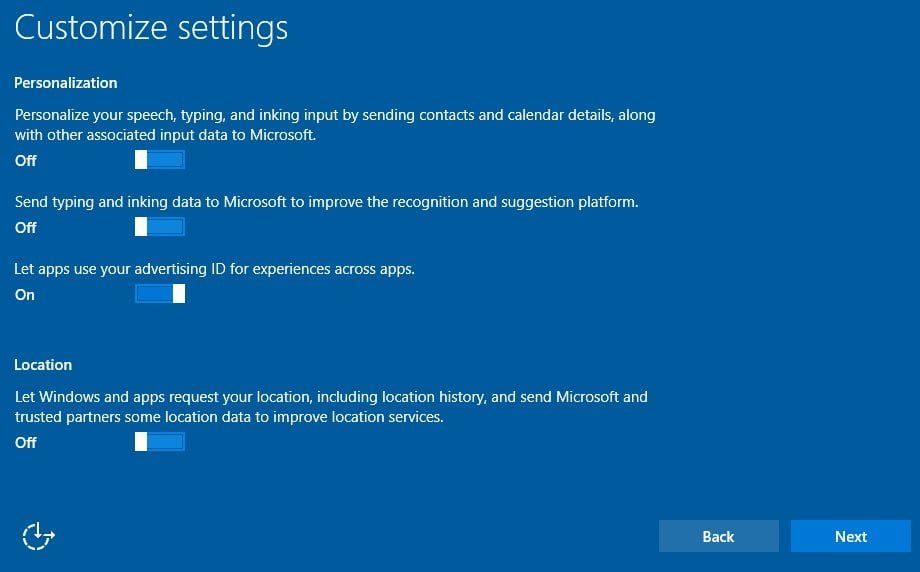
- Personalize your speech, typing, and inking input by sending contacts and calendar details, along with other associated input data to Microsoft – Select OFF.
- Send typing and inking data
(The Keylogger)to Microsoft to improve the recognition and suggestion platform – Select OFF.
- Let apps use your advertising ID for experiences across apps – Select OFF.
- Let Windows and apps request your location, including location history, and send Microsoft and trusted partners some location data to improve location services – Select OFF.
Also read: How to Completely Remove Candy Crush Saga from Windows 10
Click Next. Now you’ll be presented with options pertaining to customize your privacy settings related to Web browsing, connectivity, and error reporting.
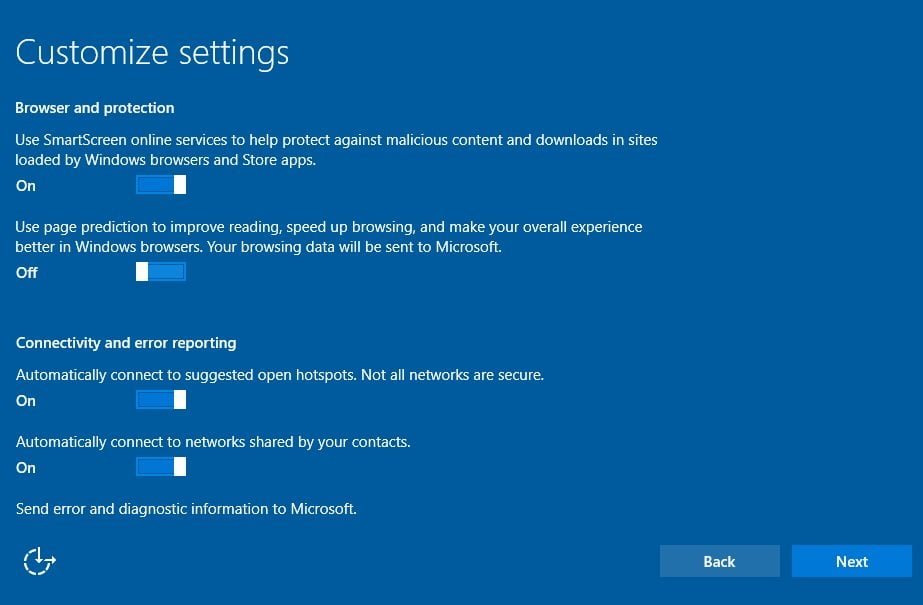
- Use SmartScreen online services to help protect against malicious content and downloads in sites loaded by Windows browsers and Store apps – Select ON. (This option is recommended to use)
- Use page prediction to improve reading, speed up browsing, and make your overall experience better in Windows browsers. Your browsing data will be sent to Microsoft – Select OFF.
- Automatically connect to suggested open hotspots. Not all networks are secure – Select OFF.
- Automatically connect to networks shared by your contacts – Select OFF.
- Send error and diagnostic information to Microsoft – Select ON. (It’s safe to use this option)
Also read: Windows 10 Will Automatically Disable Pirated Games or Softwares
Turn Off Privacy Settings in Windows 10 After Installation
Just in case, while installing Windows 10, you didn’t customize the settings as I mentioned above, you can do it now by below-given steps:
- Open the Start menu and select Settings. Alternatively, you can press Windows key + I to open Settings directly in Windows 10.
- Open Privacy, and you’ll be present with a long list of options you need to take care of.
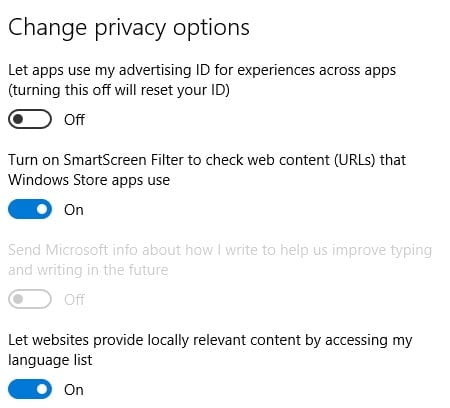
- By default, the General tab would be opened. Select options as follows:

- Let apps use my advertising ID for experiences across apps (turning this off will reset your ID) – Select OFF.
- Turn on SmartScreen Filter to check web content (URLs) that Windows Store apps use – Leave it as ON.
- Send Microsoft info about how I write to help us improving typing and writing in the future – Select OFF.
(This is the Keylogger) - Let websites provide locally relevant content by accessing my language list – Leave it ON. (I don’t see any issue leaving it ON as this option would enhance user experience).
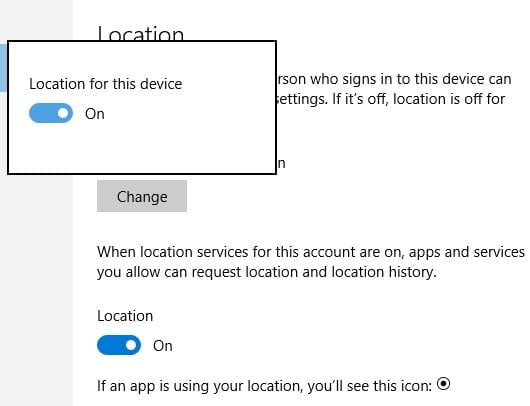
- Moving on to Location Tab, ideally, you should leave the location ON. The choice is yours. As many apps like Windows maps require location access, News, Weather, etc., or any other apps from other niches like Banking, Search, etc.
Choice is Yours.
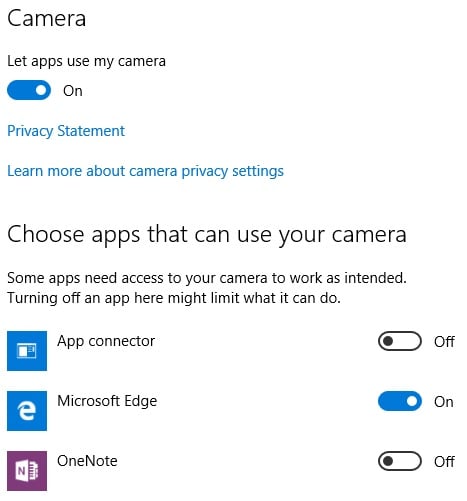
- On-Camera Tab, it’s usually required by apps like Browser and others. If you turn it OFF, then maybe when you’ll install Skype, you’ll not be able to do video chat, as all apps would be blocked to use Camera. Hence ideally, you can leave this ON.
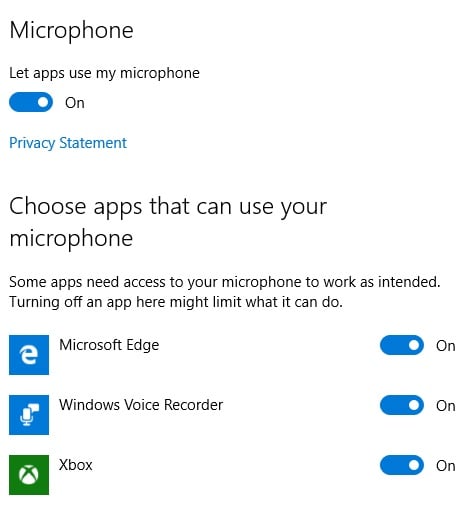
- The microphone can also be left ON. I don’t see any issue leaving it ON as it would be required for doing voice chats via apps.
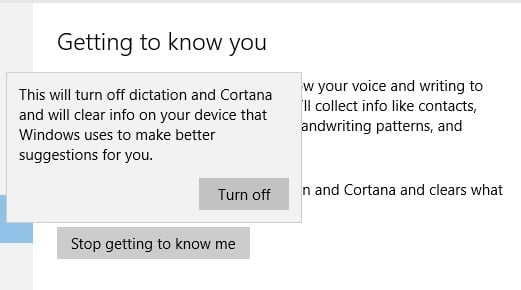
- Speech, inking & typing (Getting to know you) helps Windows and Cortana to get to know you better by collecting data like Contacts, calendar entries, speech, handwriting patterns, and typing history. Immediately turn this Setting OFF.
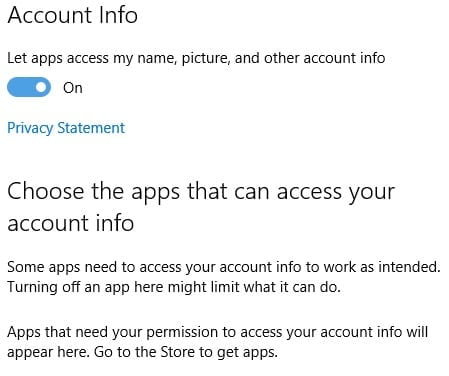
- Account Info should be turned OFF, as we are not sure what use of this information any app would do.
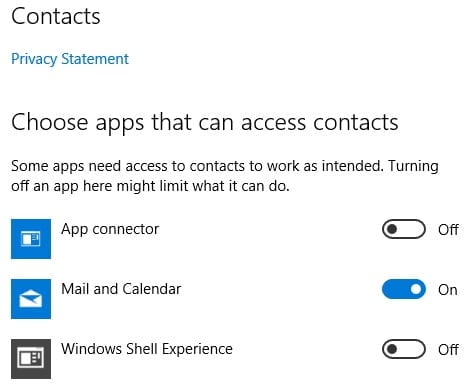
- Contacts access can be turned OFF for most apps. Although it’s required by email application and would help you in getting enhanced user experience in Windows 10 and if you use email application of Windows 10, you should leave it ON, and turn it OFF for other apps.
- Email applications again require the calendar and remind you of activities while you’re busy doing other works. Ideally, I would leave it ON.
- Messaging must be turned OFF. I do not see any valid reason for giving any app access to your personal messages.
- Radios again should be turned OFF. I don’t want any app to use my Bluetooth without my explicit permission.
- Other Devices (Sync with devices) should be turned OFF unless if you use devices like Beacons, which is a low-cost piece of hardware — small enough to attach to a wall or countertop — that use battery-friendly, low-energy Bluetooth connections to transmit messages or prompts directly to a smartphone or tablet. Also, if you have an Xbox or other devices that sync and pair with your tablet or PC having Windows 10, you can leave this ON.
Also Read: Fix Cannot Download Windows Updates in Windows 10 and 8 When Behind a Proxy or Firewall
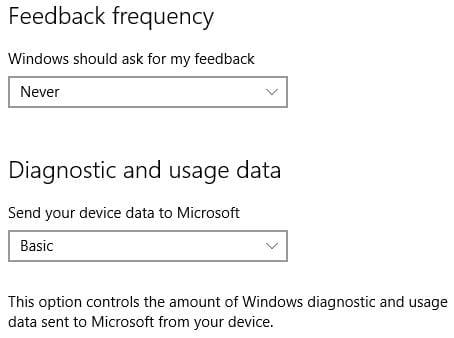
- Feedback & Diagnostics can be turned OFF. You’ll need to select
Neverfrom the drop-down menu of “Windows should ask for my feedback.” Or if you’re kind enough to give Microsoft your valuable feedback, then you can turn this setting ON by selectingOnce a Weekfrom the dropdown.
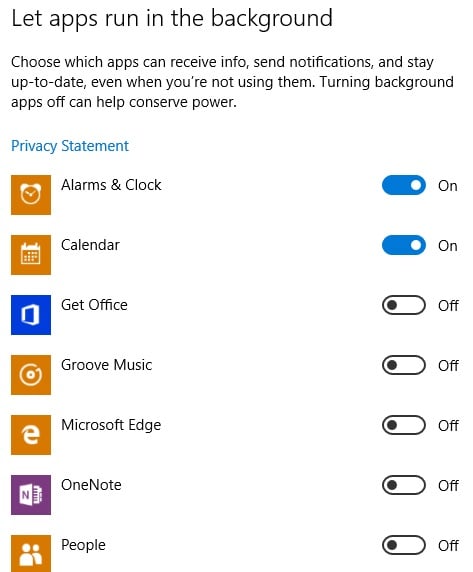
- Background apps – Ideally, I don’t like to allow so many apps to keep running in the background as these consume battery and creates a distraction at work. Turning off Apps background activities can enhance battery life a lot. Be wise in selecting which one to Turn OFF and which not.
Turn OFF WiFi Sense
Open Settings and then “Network and Internet.” Navigate to the WiFi tab and select your current wireless connection and click Manage WiFi settings. WiFi sense is a significant threat to your privacy and must not be left ON. Read more about it here, why WiFi sense must be turned OFF.

To turn OFF WiFi sense, just toggle OFF both settings i.e. Connect to suggested open hotspots and Connect to Networks shared by my contacts.
Turn OFF How Windows 10 Updates are Delivered
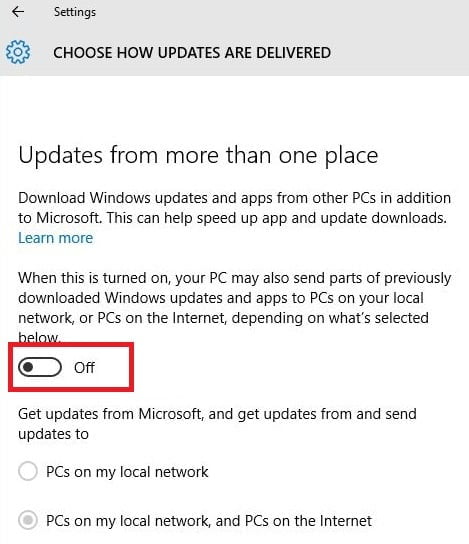
- Open Settings and select “Update and Security.”
- Open Windows Update Tab and select Advanced Options.
- Click “Choose how updates are delivered.“
- Turn the Toggle to OFF for “Updates from more than one place.”
Also read: How to Stop Automatic Updates of Windows 10
Turn OFF Windows Error Reporting Service
To turn OFF windows error reporting service, you need to set it to manual setting.
- Open Run command box by pressing Windows key + R.
- Type in the following command:
services.msc
and Enter. Services dialog box would open up.
- Select Windows Error Reporting Service to Manual by double-clicking on it and selecting Startup type to Manual from the dropdown menu.
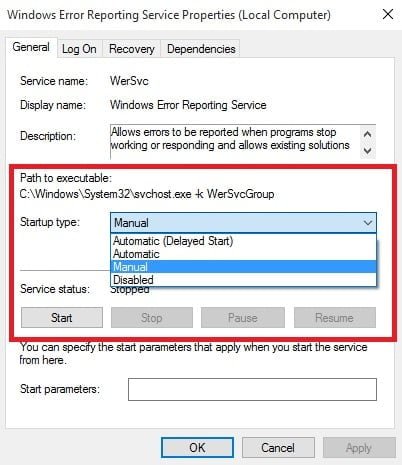
- Also, select “Diagnostic Tracking Service” and “dmwappushsvc“ and set both to Manual or Disabled for Startup type. Stopping these two would stop
transfer of telemetry and data collectionin Windows 10.
![]()
Turn OFF Customer Experience Improvement Program (CEIP)
Customer Improvement Program is a hidden service that collects information about your computer hardware and your usage pattern, collects that data, and sends it to Microsoft secretly. You might get shocked to know that this program could even count how many times you opened the Start menu or how many programs you have pinned in your Taskbar. This is one of the most significant privacy buster program in Windows 10. To turn this feature OFF, do the following steps:
Also read: How to Stop Automatic Updates of Windows 10
- The easiest way to access this setting by typing it in on the search bar of Windows 10.
- Type in: customer experience improvement and the select result of “
Change Customer Experience Improvement Program Settings“.
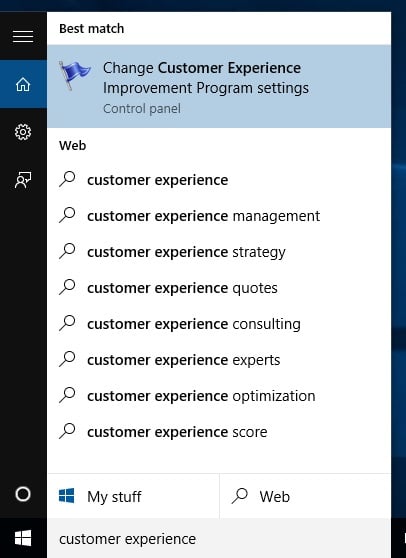
- Select NO, I don’t want to participate in the program.
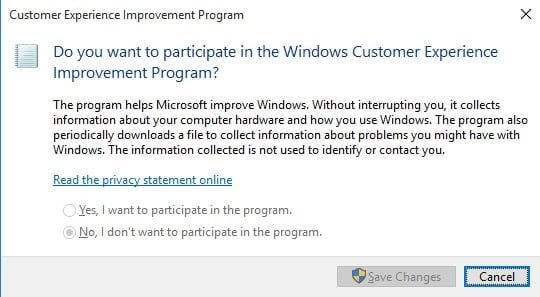
Since I had Windows 10 Enterprise activated, so these options are grayed out for me permanently, as you can see in the screenshot.
Turn OFF Cortana or Remove it Completely.
Last you need to turn OFF Cortana as it’s of the biggest program which collects user’s data and sends it to Microsoft. Here’s a guide to completely disable Cortana and removing it from Windows 10.
I hope you may follow all steps given on this ultimate guide to turning OFF windows ten privacy settings.
hello, i need some help.
so i downloaded and installed windows anniversary with Windows Update Assistant, which during installation (97%) i turn off the display (not sleep) ,and went to work. after i came back, it shows up as login screen and i typed my password, then lots of loading screen such as “Hi” , “We’ve updated windows blabla”
but i dont get the expresse setting menu, cortana menu, etc. it just booted to desktop. is it normal or i need to reinstall the windows to make sure?
thank you.
Ignore that. Even upon automatic update of windows, your previous settings are restored.