With the release of Windows 10, Microsoft has changed the way this operating system logs being created and then how to view them. Till now, we have been viewing Windows Logs of previous versions operating system in Windowsupdates.log file. However, this file is still present in Windows 10, but when you open it, it’ll not show you logs; instead, you’ll find the following information in it:
|
1 |
Windows Update logs are now generated using ETW (Event Tracing for Windows). Please run the Get-WindowsUpdateLog PowerShell command to convert ETW traces into a readable WindowsUpdate.log |
How to Find Windows 10 Update Logs and Read using PowerShell
So, while Microsoft has done so many changes in Windows 10, they totally transformed the way we may peak into Windows Update logs. So, in order to view WindowsUpdate.log in Windows 10, there are two ways:
- Decoding Windows Update ETL files
- Using Windows PowerShell cmdlet to re-create the WinodwsUpdate.log, as it has been in previous versions of Windows
For Windows 10, using PowerShell is the best way to view Windows Logs, but is less reliable. Hence, we have prioritized the solutions below:
Solution 1 (Takes more time than Solution 2)
Using this method, you can directly decode Windows Update .etl files in human-readable form for getting the windows update information during various troubleshooting. So, here are the steps to do it:
- First, you need to download public symbols from here and copy it to the following path:
|
1 |
%systemdrive%:\symbols |
- You can open the above location by copying this path to the “Run” dialog box and enter.
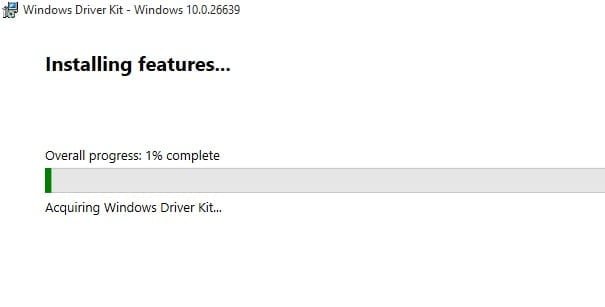
- Download Windows 10 kits and tools and install it.

- Now locate “Tracefmt.exe” by using Windows Search and copy it to the following path:
|
1 |
%systemdrive%\WULogs |
Where %systemdrive% is your operating system drive, e.g., C:\, if the WULogs folder is not available, create one.
- After copying “Tracefmt.exe,” Right-click on Start menu and select “Command Prompt (Admin).”
- Run following commands in “Command Prompt.”
|
1 2 3 |
cd /d %systemdrive%\WULogs copy %windir%\Logs\WindowsUpdate\* %systemdrive%\WULogs\ tracefmt.exe -o windowsupate.log <Windows Update logs> -r c:\Symbols |
Where <Winodw Update Logs> syntax would be replaced by Windows Update .etl files name, you can list all files name in one command like below:
|
1 |
tracefmt.exe -o windowsupate.log WindowsUpdateFile1.etl WindowsUpdateFile2.etl -r c:\Symbols |
This would generate a combined WinodwsUpdate.log file for you.
Solution 2
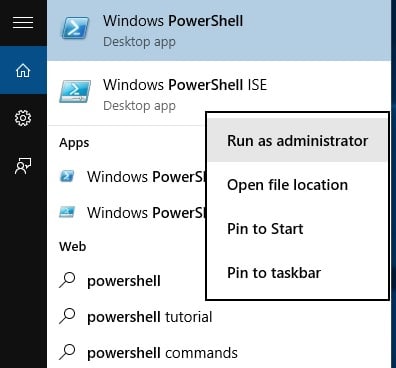
- Open start menu and type “PowerShell” and on the result of “PowerShell ISE,” right-click and select “Run as Administrator.”
- PowerShell can take a while to open if running the first time. Run following command in PowerShell:
|
1 |
PS C:\WINDOWS\system32> Get-WindowsUpdateLog |
- This process can take a while to complete, so be patient. Once it’s complete, you’ll find a similar screen as below.
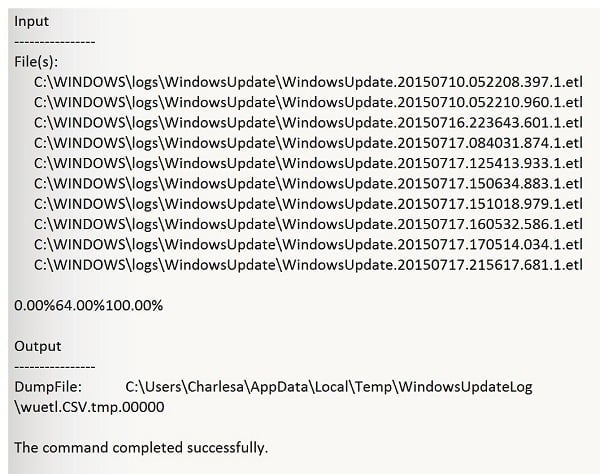
Open your desktop, and you’ll find a new file named WindowsUpdate.log.
Also on Trouble Fixers
Now, the file WindowsUpdate.log generated using command Get-WindowsUpdate.log is a static file, and we need to get it into terms of auto-updating so that you don’t have to update the whole procedure of running the PowerShell again and again. To accomplish that, you can create a script using PowerShell which shall auto-update the log file with recent activities, so that you may troubleshoot things in real-time if doing any.
For creating a script, commands in PowerShell could be something similar as below:
|
1 2 |
Parameter Set: Default Get-WindowsUpdateLog [[-ETLPath] <String[]> ] [[-LogPath] <String> ] [[-SymbolServer] <String> ] [-ForceFlush] [-InformationAction <ActionPreference> {SilentlyContinue | Stop | Continue | Inquire | Ignore | Suspend} ] [-InformationVariable <String> ] [-ProcessingType <String> {CSV | XML} ] [-Confirm] [-WhatIf] [ <CommonParameters>] |
For more details, visit the Get-WindowsUpdateLog method, which shall help you in merging Windows update .etl files into a single WindowsUpdate.log file.
I tried way two but i get this error:
Get-Process : Es wurde kein Positionsparameter gefunden, der das Argument “Get-WindowsUpdateLog” akzeptiert.
In Zeile:1 Zeichen:1
+ PS C:\WINDOWS\system32> Get-WindowsUpdateLog
+ ~~~~~~~~~~~~~~~~~~~~~~~~~~~~~~~~~~~~~~~~~~~~
+ CategoryInfo : InvalidArgument: (:) [Get-Process], ParameterBindingException
+ FullyQualifiedErrorId : PositionalParameterNotFound,Microsoft.PowerShell.Commands.GetProcessCommand
why?
Kindly use
Get-WindowsUpdateLogORPS > Get-WindowsUpdateLogand see if that works?